
This tutorial demonstrates how to run Cirq on the Google Cloud Platform. It shows how to install Cirq within a Docker container on a GCE Virtual Machine and view the results. You will run the simulation in a Jupyter environment and interactively within the container. In this tutorial you will:
- Create a Container Optimized VM
- Run Docker container with Jupyter and qsim installed
- Run a demo circuit
GCP setup
Costs
This tutorial uses billable components of Google Cloud Platform, including the Compute Engine. Use the Pricing Calculator to generate a cost estimate based on your projected usage.
Before you begin
These are the steps to follow to get started with this tutorial:
- Creating a Cloud Platform project
- Enabling billing for the project
- Enable Google Compute Engine API
For this reference guide, you need a Google Cloud project. You can create a new one, or select a project you already created:
- Select or create a Google Cloud project on the project selector page.
- Enable billing for your project.
After finishing this tutorial, you can avoid continued billing by deleting the resources you created. See Clean up section below for details.
Create a GCE VM
Once you have a project enabled with a billing account, you will be able to create resources. The key resource required for this project is a Virtual Machine (VM) used to run the qsim quantum simulations.
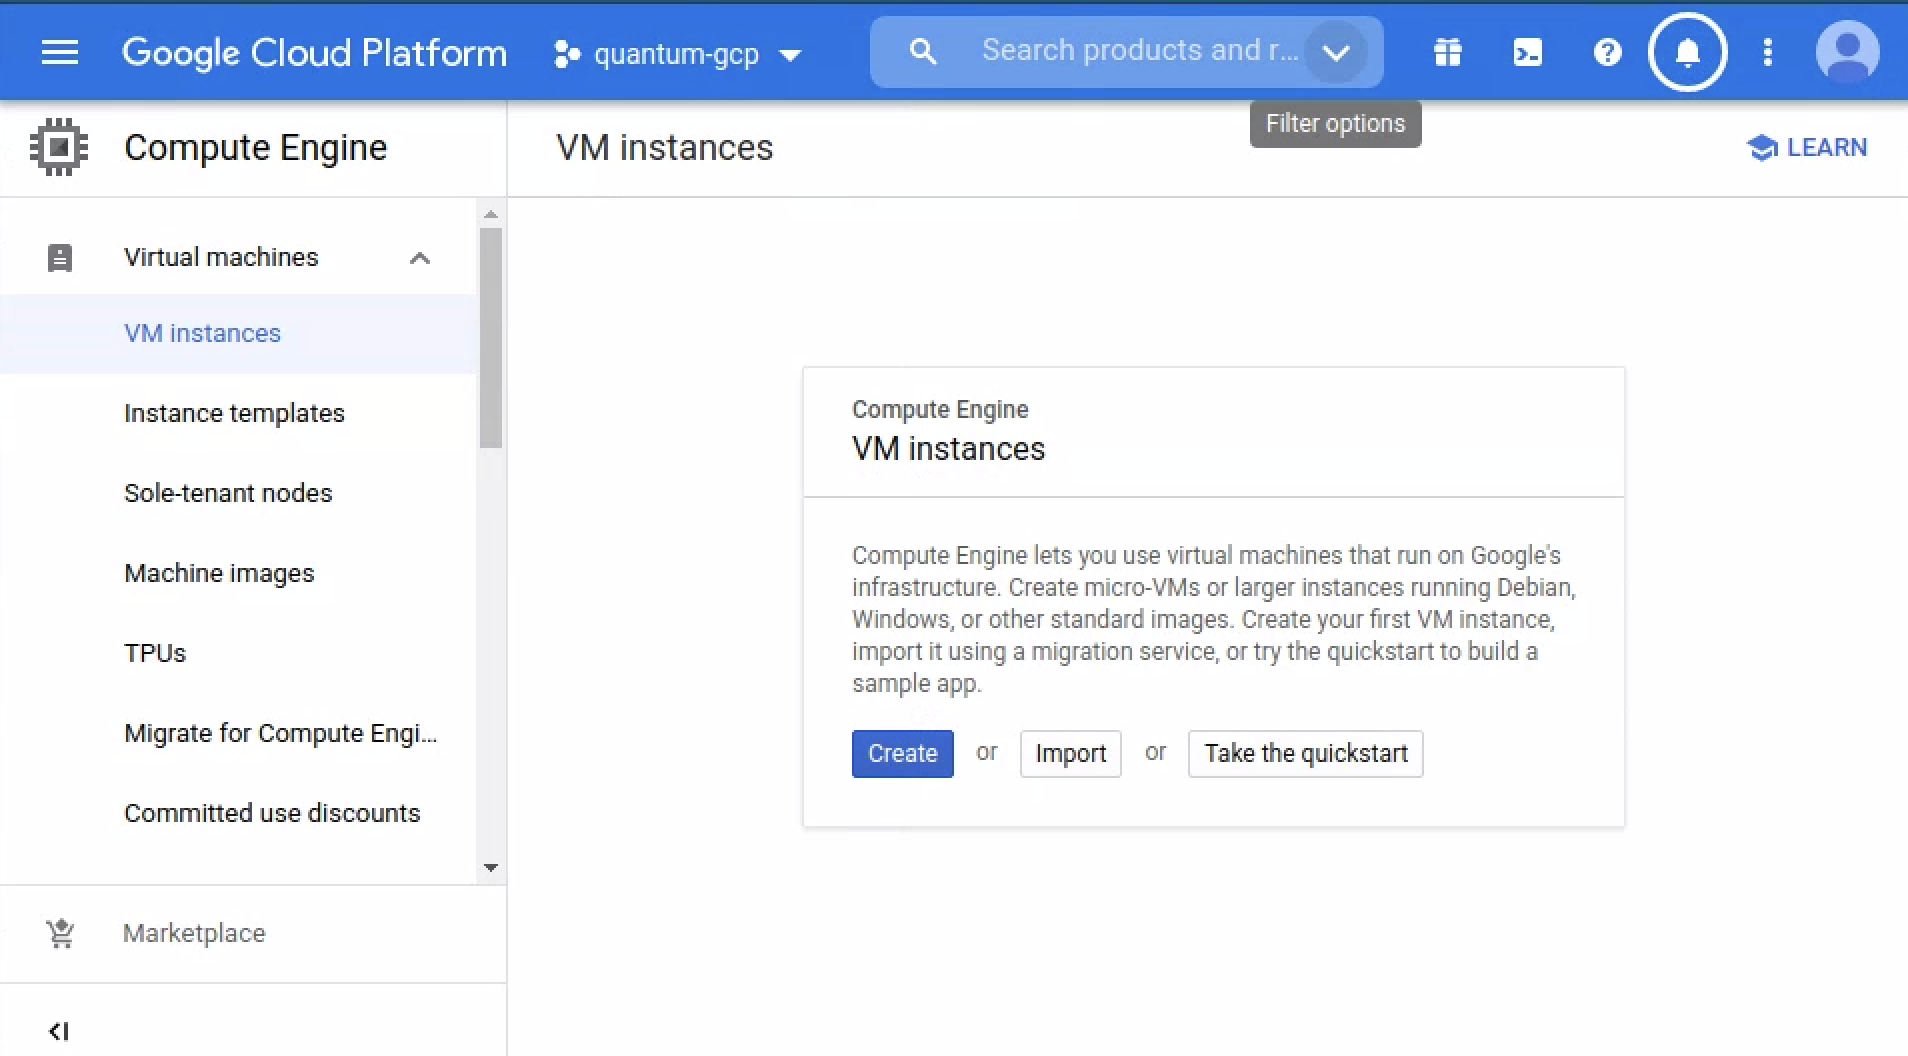
Use the Cloud Console
Connect to the Cloud Console and make sure your current project is selected. Then click on Create for a new VM instance:
Build a Container Optimized VM with container deployed
To create the VM use the steps in sequence below:
- Change the name of the VM to be something meaningful like "qsim-1".
- Choose a Region and Zone
- The values are not too important now, but for latency and availability you may make a different choice.
- Choose the machine family / series: N2
- Quantum simulation requires powerful processors—the N2, N1, or C2 will work.
- But if you have your own preferences, other machine types are available.
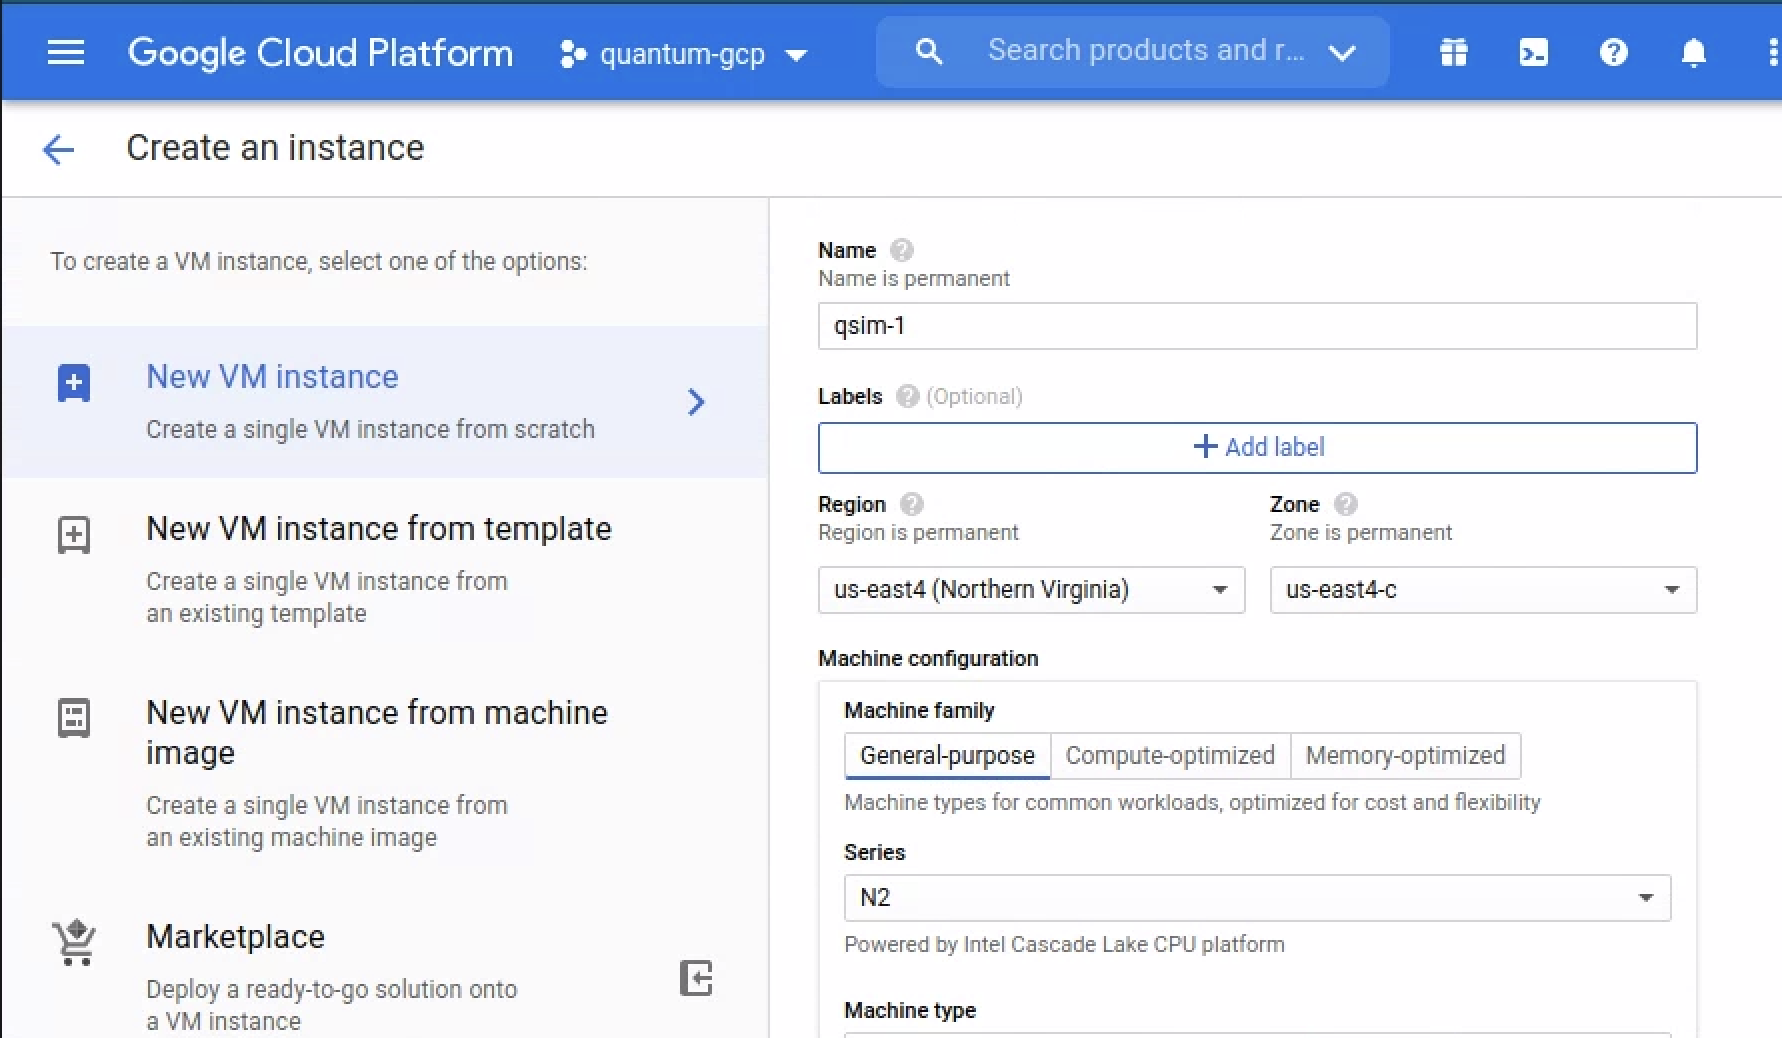
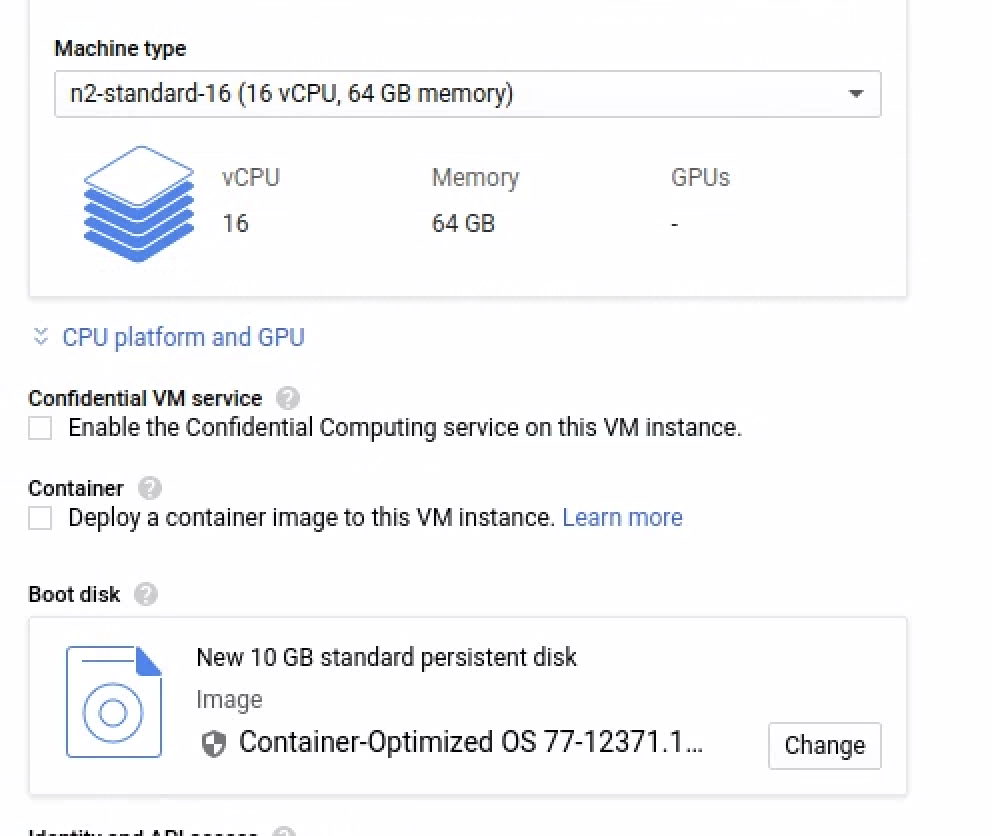
- Choose the Machine Type: n2-standard-16
- 16 CPUs
- 64GB memory
- Leave the remaining as defaults.
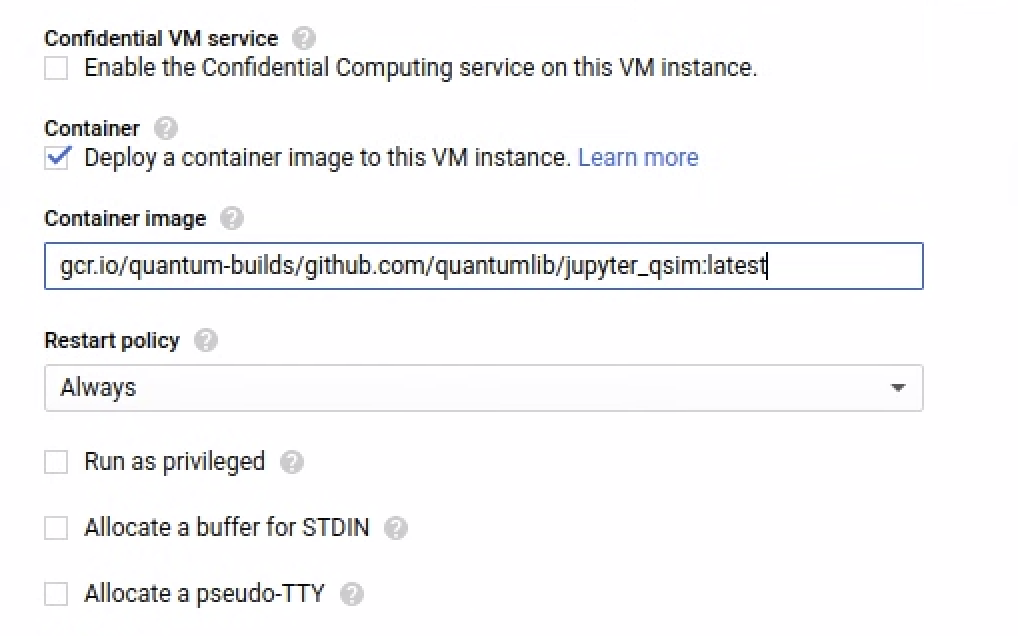
Select
Deploy a container image to this VM instance.
For the container image enter:
gcr.io/quantum-builds/github.com/quantumlib/jupyter_qsim:latest
This may take a few minutes to complete, even after the VM is created, the container will take some time to complete.
Preparing your local system to connect to Colab
Google Colab allows you to write and execute Python in your browser, with:
- Zero configuration required
- Free access to GPUs
- Easy sharing
This tutorial focuses on how to run simulations GCE VM your created above using Colab as the UI / frontend.
Install gcloud on your local machine
In order to connect your VM to Colab, you need to forward the default Jupyter
port (8888) to your localhost. Port forwarding to a GCP VM requires that you
have the Google Cloud Platform SDK installed on your local computer. This will
give you access to the gcloud command. See the
Installing Google Cloud SDK guide.
After installing, initialize the Google Cloud environment:
$ gcloud init
Respond to the prompts with your project ID and the zone where you created your
VM. When completed, view the gcloud configuration:
$ gcloud config list
Output should look something like:
region = us-east4
zone = us-east4-c
[core]
account = wellhello@gargle.com
disable_usage_reporting = False
project = quantum-22222
Connect via port forward to your VM
You are now ready to connect to your VM through a port forward gcloud command.
Detailed instructions can be found in the
Colab local runtimes guide,
but the following instructions are sufficient to succeed. Connect up with SSH
with port 8888 forwarded to your local machine:
$ gcloud compute ssh [YOUR_INSTANCE_NAME] -- -L 8888:localhost:8888
You should now see the command line prompt from your VM:
wellhello@qsim-1 ~ $
The container port is now forwarded to your local machine.
Connect Colab to your local runtime
First, get a notebook up and running on Colab. Open the Get started with qsimcirq notebook in Colab.
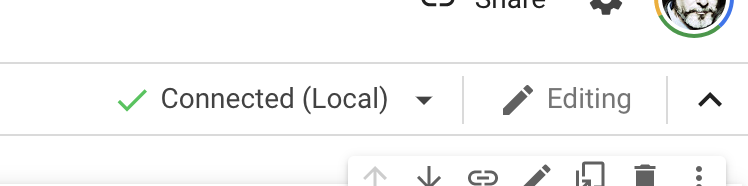
If you are connect to Colab with a notebook visible, you can click Connect to get the UI:

Select Connect to local runtime. You will see the UI:
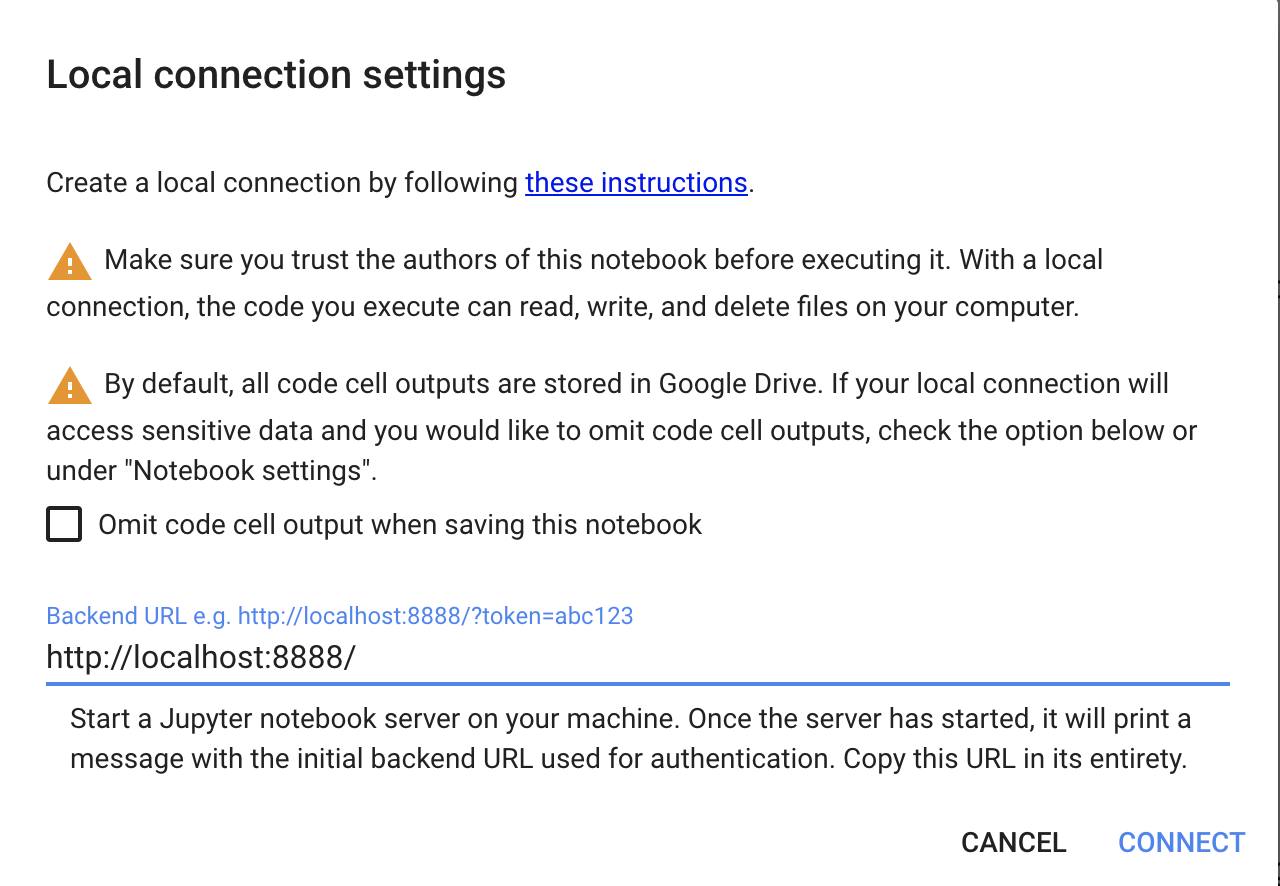
Type in the URL http://localhost:8888/ , then click Connect:
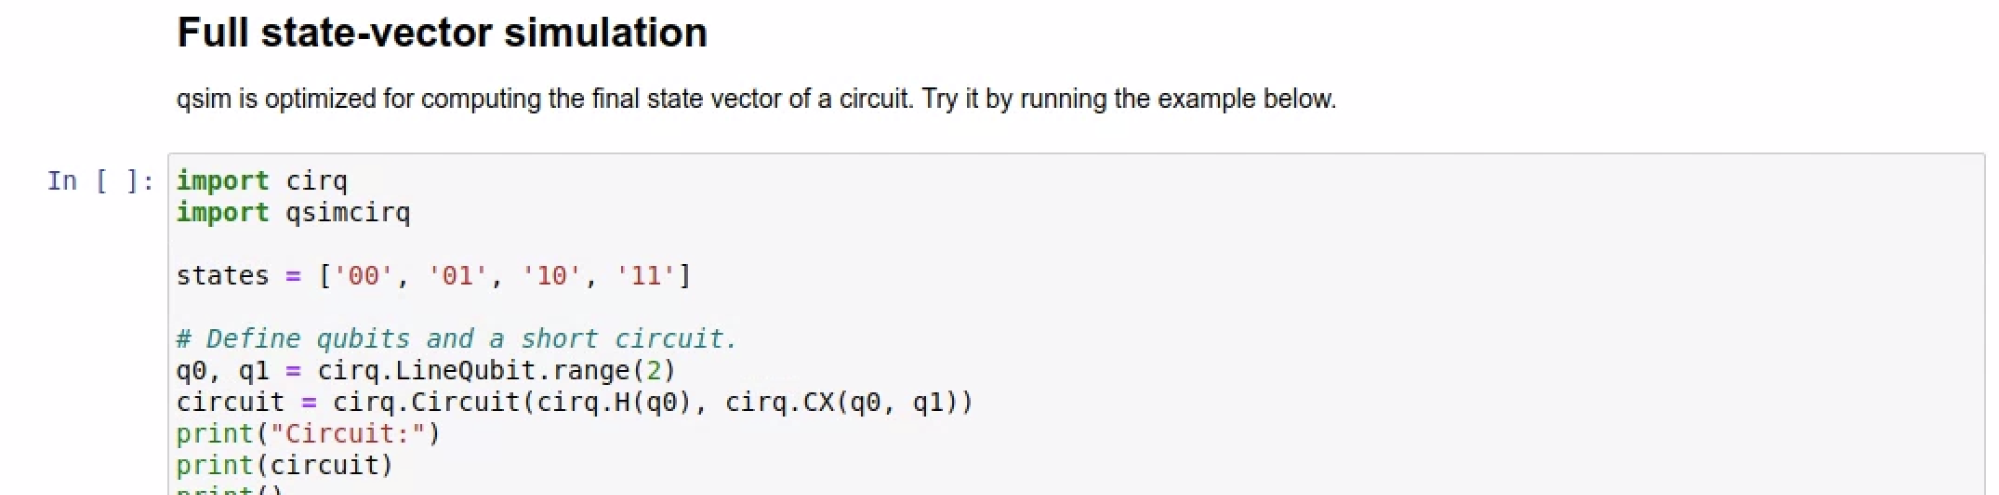
You should now be able to run the cells in the notebook.
Large circuit
A large circuit is provided with 32 qubits and a depth of 14 gate operations. Open the Simulate large quantum circuit notebook in Colab.
This large circuit will not succeed if you attempt to run the default runtime. Ensure that you repeat the connection procedure to the local runtime.
Optional: Connect to Jupyter directly
Once you have port 8888 forwarded and the container running on your GCE VM, it is easy to connect directly to Jupyter without using Colab.
In the previous step, you copied a URL like below. It is easy to just copy that URL and paste it directly into a browser running on your local machine.
http://127.0.0.1:8888/
In the browser you should now see the Jupyter UI:
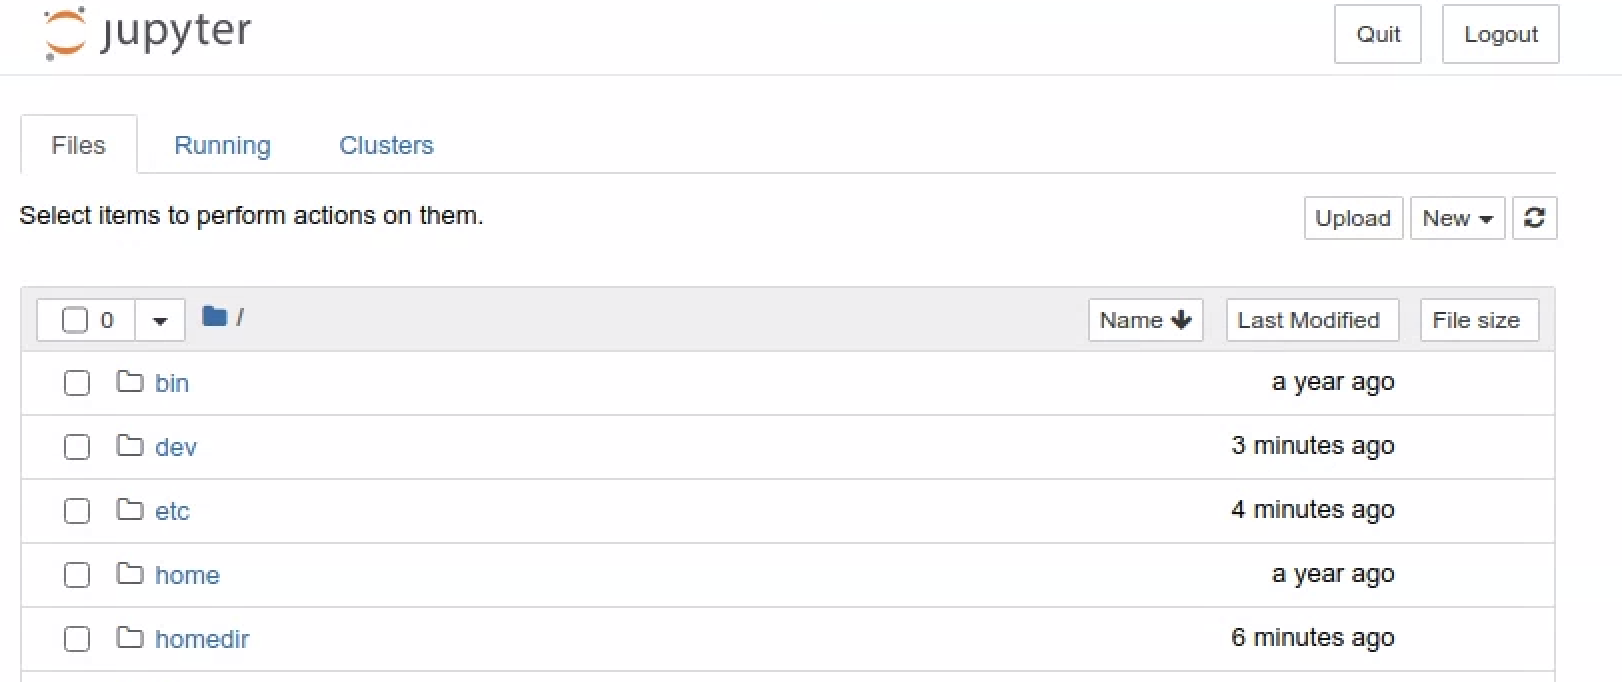
To see the notebooks, navigate to qsim > docs > tutorials. You will see:
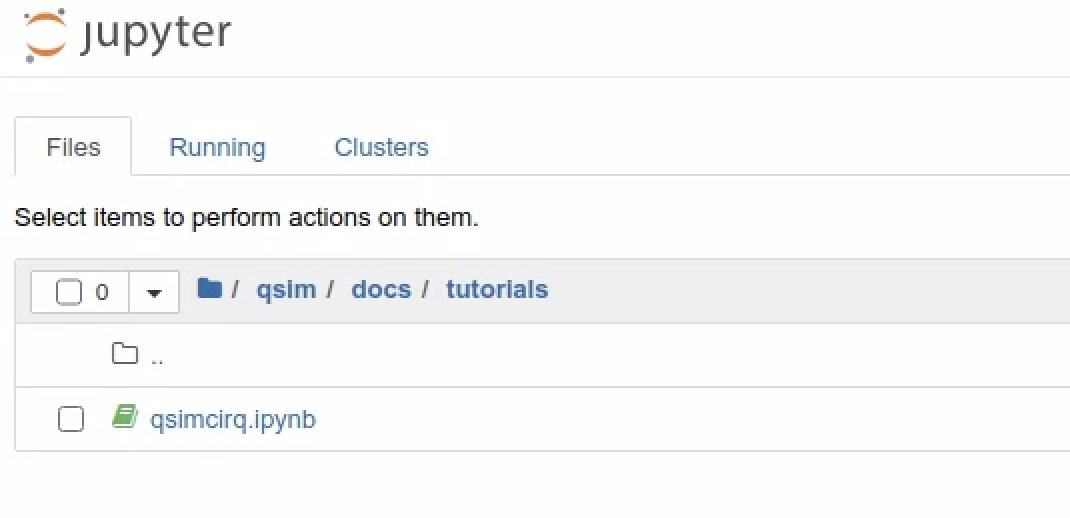
Click on the qsimcirq.ipynb file. This will load the notebook.
You can now run these cells as you would in any notebook.
Run interactively
To run interactively within the container, you can open a second shell window to the VM as you did above, but without the port forwarding:
$ gcloud compute ssh [YOUR_VM_NAME]
Now, find the container ID with docker ps to see something like this:
$ docker ps

CONTAINER ID        IMAGE                                       COMMAND                  CREATED             STATUS              PORTS                    NAMES
8ab217d640a3        gcr.io/quantum-291919/jupyter_qsim:latest   "jupyter-notebook --…"   2 hours ago         Up 2 hours          0.0.0.0:8888->8888/tcp   dazzling_lovelace
The CONTAINER_ID is a UID something like "8ab217d640a3". Now you can connect to the container:
$ docker exec -it [CONTAINER_ID] /bin/bash
Build the circuit
Run Python 3:
$ python3
To import the libraries and build the circuit, copy and paste following into the VM window.
import cirq
import qsimcirq

qubit = cirq.GridQubit(0, 0)  # Pick a qubit.

# Create a circuit
circuit = cirq.Circuit(
    cirq.X(qubit)**0.5,  # Square root of NOT.
)
print("Circuit:")
print(circuit)
You should see the output as
(0, 0): ───X^0.5───
Run the circuit
Now to see what the circuit does when under qsim. Again, copy the following into your VM window:
simulator = qsimcirq.QSimSimulator()
result = simulator.simulate(circuit)
print("Result:")
print(result)
The output is:
measurements: (no measurements)
output vector: (0.5+0.5j)|0⟩ + (0.5-0.5j)|1⟩
You have successfully simulated a quantum circuit on Google Cloud Platform using a Docker container.
Clean up
To avoid incurring charges to your Google Cloud Platform account for the resources used in this tutorial:
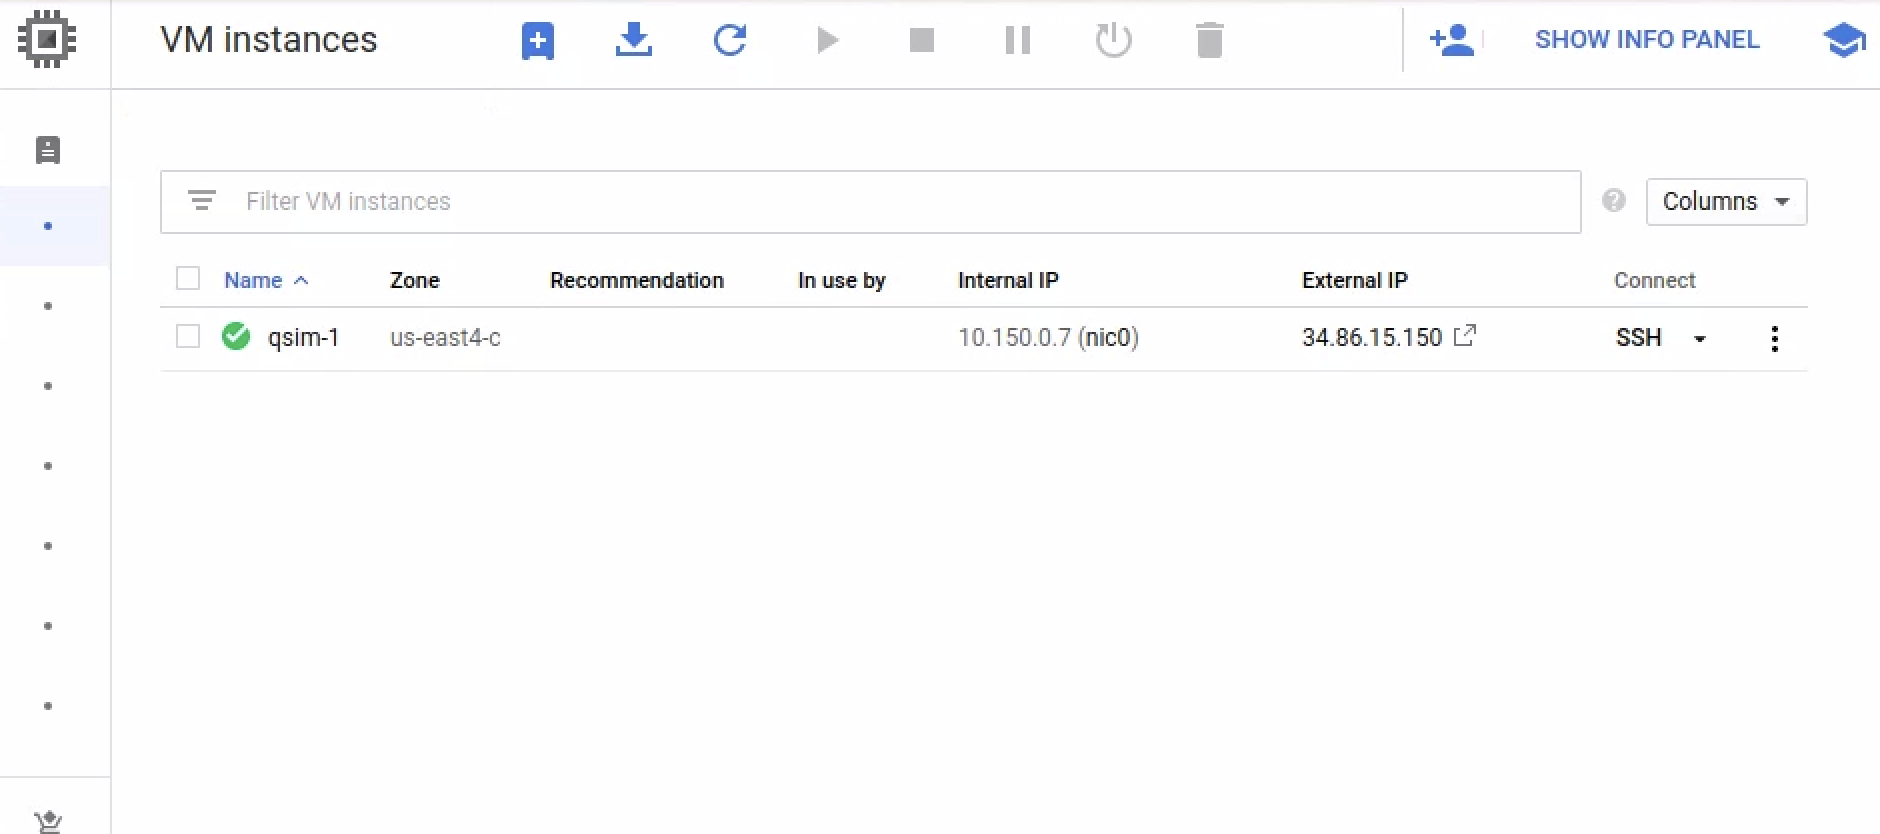
Delete the VM
It is usually recommended to delete the entire project you created for this tutorial, but if you want to continue using the project, you can easily either STOP the VM or Delete it. Select the VM, the either select the STOP square, or the DELETE trash can.
Delete the project
The easiest way to eliminate billing is to delete the project you created for the tutorial.
Be aware that deleting a project has the following effects:
- Everything in the project is deleted. If you used an existing project for this tutorial, when you delete it, you also delete any other work you've done in the project.
- Custom project IDs are lost. When you created this project, you might have
created a custom project ID that you want to use in the future. To preserve
the URLs that use the project ID, such as an
appspot.comURL, delete selected resources inside the project instead of deleting the whole project.
If you plan to explore multiple tutorials and quickstarts, reusing projects can help you avoid exceeding project quota limits.
- In the Cloud Console, got to the Manage Resources page.
- In the project list, select the project that you want to delete and then
click Delete.

- In the dialog, type the project ID and then click Shut down to delete the project.