
In this tutorial, you configure and test a virtual machine (VM) to run CPU-based quantum simulations. The configuration in this tutorial uses the qsim Docker container, running on a Google Compute Engine VM.
1. Create a virtual machine
Follow the instructions in the Quickstart using a Linux VM guide to create a VM. In addition to the guidance under the Create a Linux VM instance heading, ensure that your VM has the following properties:
- In the Machine Configuration section:
- Select the tab for the Compute Optimized machine family.
- In the machine Series option, choose C2.
- In the Machine type option, choose c2-standard-16. This option gives you 16 virtual CPUS and 64GB of RAM. Note: This choice is for demonstration purposes only. For a live experiment, see Choosing hardware for your qsim simulation.
- In the Boot disk section, click the Change button, and choose Container-Optimized operating system. This overrides the selection in step 3 in Create a Linux VM instance.
- In the Firewall section, ensure that both the Allow HTTP traffic checkbox and the Allow HTTPS traffic checkbox are selected.
When Google Cloud finishes creating the VM, you can see your VM listed in the Compute Instances dashboard for your project.
Find out more
2. Prepare your computer
Use SSH to create an encrypted tunnel from your computer to your VM and redirect a local port to your VM over the tunnel.
- Install the
gcloudcommand line tool. Follow the instructions in the Installing Cloud SDK documentation. - After installation, run the
gcloud initcommand to initialize the Google Cloud environment. You need to provide thegcloudtool with details about your VM, such as the project name and the region where your VM is located.- You can verify your environment by using the
gcloud config listcommand.
- You can verify your environment by using the
Create an SSH tunnel and redirect a local port to use the tunnel by typing the following command in a terminal window on your computer. Replace
[YOUR_INSTANCE_NAME]with the name of your VM.gcloud compute ssh [YOUR_INSTANCE_NAME] -- -L 8888:localhost:8888
When the command completes successfully, your prompt changes from your local machine to your virtual machine.
3. Start the qsim Docker container on your virtual machine
On the VM that you just created, start the qsim container:
docker run -v `pwd`:/homedir -p 8888:8888 gcr.io/quantum-builds/github.com/quantumlib/jupyter_qsim:latest &If you see a
permission deniederror message, you might need to addsudobefore your Docker command. For more information about running Docker, see thedocker runcommand reference.Verify the output from Docker when as it downloads and starts the container. The last few lines should be similar to the following output:
To access the notebook, open this file in a browser:
    file:///root/.local/share/jupyter/runtime/nbserver-1-open.html
Or copy and paste one of these URLs:
    http://e1f7a7cca9fa:8888/?token=aa16e1b6d3f51c58928037d34cc6854dac47347dd4c0eae5
    or http://127.0.0.1:8888/?token=aa16e1b6d3f51c58928037d34cc6854dac47347dd4c0eae5
Copy the URL in the last line of output from your console, and save it for the next task.
4. Connect to your virtual machine
The easiest way to use your VM is through a notebook environment like Google Colaboratory (Colab). Google Colab is a free, hosted notebook environment that enables you to write, execute, and share Python code from your browser.
However, the qsim Docker image also includes a Jupyter kernel and other command-line tools. These tools enable you to connect directly to your container and run your code.
Colab
You can write code in a Colab notebook, and use your VM to run your code. In this scenario, we use the Get Started with qsimcirq Colab notebook.
- Open the Get Started with qsimcirq notebook.
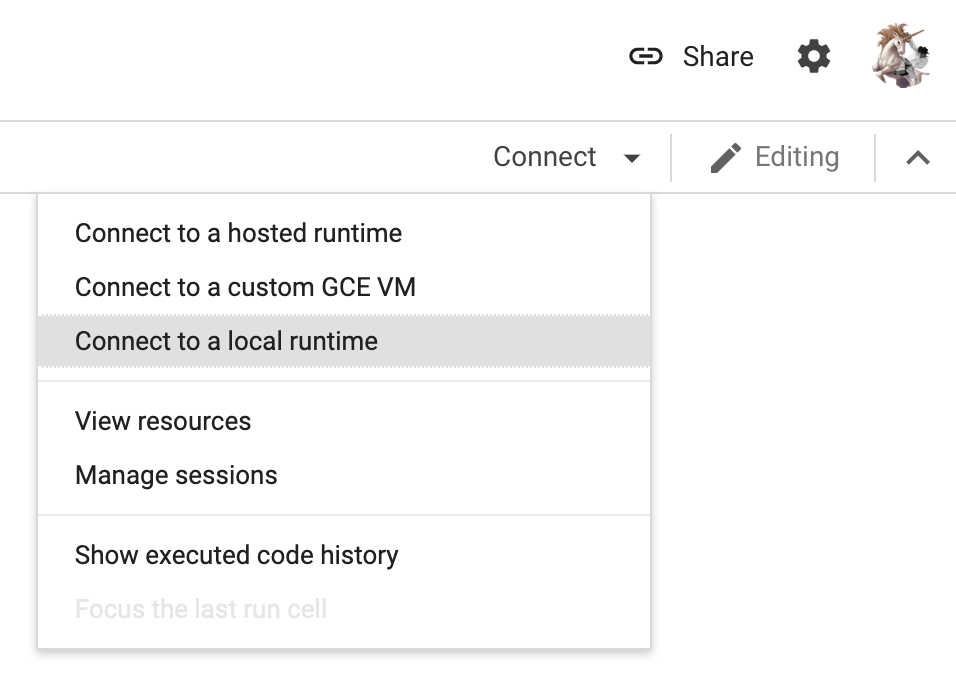
- Click the Connect drop-down menu. the Connect button to open the menu.
- Choose the Connect to a local runtime option to open the Local
connection settings window.
- In the Backend URL text field, paste the URL that you saved in task 3.
- Change the part of your URL that read
127.0.0.1tolocalhost.
Click the Connect button in the Local connection settings window.
When your connection is ready, Colab displays a green checkmark beside the Connected (Local) drop-down menu.
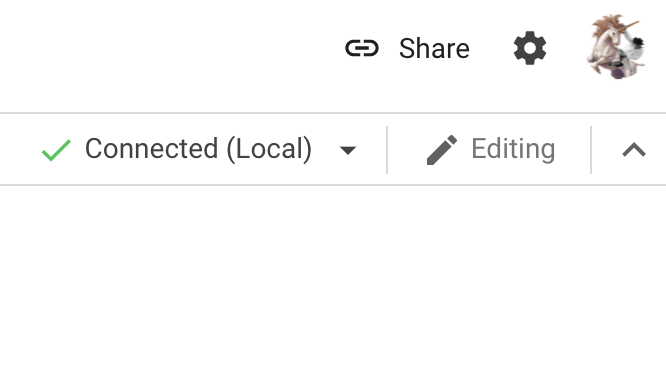
The code cells in your notebook now execute on your VM instead of your local computer.
Jupyter
You can run your simulation directly in your Docker container, in Jupyter. Jupyter runs in the qsim Docker container.
- Open a browser window.
- In the navigation bar, paste the URL that you copied in task 3.
In the browser you should now see the Jupyter UI, running on your VM.
The code that you execute here executes on your VM. You can navigate to qsim > docs > tutorials to try other tutorials.
Command line
You can run a quantum simulation using qsim from the command line. Your code runs in the qsim Docker container.
Before you begin
For this scenario, you can connect to your machine directly over SSH rather than create a tunnel. In task 2, step 3 above, remove the second half of the command. Instead of this command:
gcloud compute ssh [YOUR_INSTANCE_NAME] -- -L 8888:localhost:8888
Run:
gcloud compute ssh [YOUR_INSTANCE_NAME]
Either command works for the purpose of this tutorial. Continue to task 4 then complete the steps below, regardless of which command you use.
1. Copy the container ID for your qsim Docker container
Run docker ps to display the container ID. The output should look like
the following text:
  CONTAINER ID IMAGE COMMAND CREATED STATUS PORTS NAMES i
  8ab217d640a3 gcr.io/quantum-291919/jupyter_qsim:latest "jupyter-notebook --…" 2 hours ago Up 2 hours 0.0.0.0:8888->8888/tcp dazzling_lovelace.
In this case, the container ID is 8ab217d640a3.
2. Connect to your qsim Docker container
Run docker exec to login to your container. Replace [CONTAINER_ID]
with the ID that you copied in step 1.
docker exec -it [CONTAINER_ID] /bin/bash
Your command prompt now executes commands in the container.
3. Verify your installation
You can use the code below to verify that qsim uses your qsim installation. You can paste the code directly into the REPL, or paste the code in a file.
  # Import Cirq and qsim
  import cirq
  import qsimcirq

  # Instantiate qubits and create a circuit
  q0, q1 = cirq.LineQubit.range(2)
  circuit = cirq.Circuit(cirq.H(q0), cirq.CX(q0, q1))

  # Instantiate a simulator that uses the GPU
  qsim_simulator = qsimcirq.QSimSimulator()

  # Run the simulation
  print("Running simulation for the following circuit:")
  print(circuit)

  qsim_results = qsim_simulator.compute_amplitudes(
      circuit, bitstrings=[0b00, 0b01])

  print("qsim results:")
  print(qsim_results)
After a moment, you should see a result that looks similar to the following.
[(0.7071067690849304+0j), 0j]
Next steps
After you finish, don't forget to stop or delete your VM on the Compute Instances dashboard to prevent further billing.
You are now ready to run your own large simulations on Google Cloud. If you want to try a large circuit on Google Cloud, you can connect the Simulate a large quantum circuit Colab notebook to your VM (documentation).
For more information about managing your VM, see the following documentation from Google Cloud:
As an alternative to Google Cloud, you can download the Docker container or the qsim source code to run quantum simulations on your own high-performance computing platform.